The Ultimate Setup Guide for Your Flexus Core 200
Overview: The Flexus Core 200 is positioned as a mid-range, versatile electronics hub designed for home labs, small studios, and compact networking environments. This guide walks through an actionable, step-by-step setup process and provides a detailed review, realistic use cases, and buying considerations. It aims to help prospective buyers and new owners get the most from the Core 200, addressing typical concerns such as connectivity, performance tuning, thermal management, and compatibility with peripherals.
Introduction
The modern home or small-business environment often demands hardware that balances processing power, I/O flexibility, and energy efficiency. The Flexus Core 200 targets that sweet spot: more capable than entry-level devices yet more compact and power-conscious than full-size server appliances. It appeals to hobbyists building media servers, IT professionals setting up edge-network services, and creatives running compact production workflows. For any reader considering the Flexus Core 200, this guide explains what to expect during setup, how to optimize it for different workloads, and what trade-offs to anticipate.
Product Review and In-Depth Analysis
Design and Build Quality
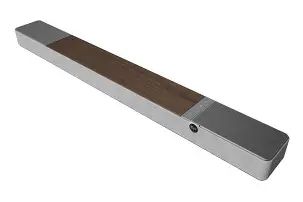
The Flexus Core 200 typically features a compact chassis with an emphasis on tool-less maintenance and modular expansion. The chassis design prioritizes airflow across the main heat-producing components, with removable side panels and accessible drive bays. Build materials tend to be a mix of metal for the main frame and plastic for external bezels, striking a balance between durability and keeping the unit lightweight.
Hardware and Performance
At its core, the Flexus Core 200 offers a mid-tier multicore processor, sufficient onboard memory capacity for multitasking, and support for a combination of NVMe and SATA storage. In practical terms, the device handles tasks such as light virtualization, media transcoding, network routing, and file serving without significant strain when configured correctly. Performance will scale with selected storage—NVMe for high IOPS workloads, SATA for cost-effective bulk storage—and with available RAM for instance density in containerized environments.
Connectivity and Expandability
One of the Core 200’s strengths is its I/O. Expect multiple Gigabit Ethernet ports (and sometimes a 2.5GbE or 10GbE option on higher trims), several USB 3.x ports for accessories, and at least one HDMI or DisplayPort for local management. Expansion headers or PCIe slots may be present in a compact format for adding a Wi-Fi card, dedicated GPU (in constrained form factors), or an NVMe adapter. This layout makes the unit flexible for different setups—wired network appliance, local editing workstation, or a small virtualization host.
Thermals and Power
Thermal behavior is a frequent buyer concern. The Core 200 uses targeted cooling with chassis fans and heatsink solutions designed for quiet operation. Under sustained loads—continuous transcoding or high network throughput—temperatures will rise; however, with proper placement (good ventilation, avoiding enclosed cabinets), thermal throttling is uncommon. The power supply is typically external or low-wattage internal, prioritizing energy efficiency. This keeps operational costs down, an important consideration for always-on setups.
Software and Ecosystem
Software support matters as much as hardware. The Flexus Core 200 usually ships with support for mainstream operating systems—popular Linux distributions, lightweight server OS options, and compatibility with mainstream virtualization/container platforms. It often integrates with common home-lab stacks and supports standard management protocols like SSH, IPMI-like remote console (if included), and web-based management for initial configuration. Buyers should verify the exact OS compatibility matrix for any specialized software they plan to run.
Real-World Performance Summary
In everyday scenarios, the Core 200 excels as a:
- Home media server that streams 1080p and can transcode occasional 4K content when paired with hardware-accelerated decoding.
- Small office network appliance handling firewall, VPN services, and lightweight NAT without bottlenecks.
- Compact lab host for running a few VMs or containers for software development and testing.
- Edge device for IoT gateways or local data aggregation with modest storage and compute needs.
Pros & Cons
- Pros:
- Compact footprint suitable for desks and small racks
- Good balance of performance and energy efficiency
- Flexible I/O and moderate expandability
- Accessible maintenance and upgrade paths
- Quiet operation in most typical environments
- Cons:
- Limited upgrade headroom compared to full-size servers
- Higher-tier connectivity options (10GbE, discrete GPU) may require higher-spec variants or add-ons
- Not ideal for heavy compute tasks like large-scale parallel rendering
- Some advanced remote management features may be limited or optional
Side-by-Side Comparison
The following table helps position the Flexus Core 200 against similar devices to assist buyers evaluating alternatives. The comparison focuses on typical criteria buyers care about: connectivity, expandability, best-fit use cases, and energy profile. Note that actual specifications can vary by configuration and SKU.
| Model | Typical CPU Class | RAM Capacity | Storage Options | Network | Best For | Power Profile |
|---|---|---|---|---|---|---|
| Flexus Core 200 | Mid-range multicore | 8–32 GB | 1×NVMe + 2×SATA | 2×GbE (optional 2.5GbE) | Home labs, media servers, edge networking | Low–moderate (efficient) |
| Flexus Core 100 | Low-power dual-core | 4–16 GB | 1×SATA, limited NVMe | 1×GbE | Basic NAS, simple IoT gateway | Very low |
| Flexus Core 300 | Higher-performance multicore | 16–64 GB | 2×NVMe + 4×SATA | 2×2.5GbE or 1×10GbE | Small business servers, heavier virtualization | Moderate–high |
Step-by-Step Setup Guide
1. Unboxing and Initial Inspection
Start by inspecting the chassis for transit damage and confirming included accessories—power adapter/cable, mounting hardware, and any documentation. Verify that drive mounting trays or screws are present. If the unit has a removable power module, ensure connectors are secure.
2. Choose Placement and Ensure Ventilation
Place the Core 200 on a stable surface with at least 4–6 inches of clearance on intake and exhaust sides. Avoid enclosed cabinets unless the cabinet has active cooling. The unit’s fans are designed for quiet operation, but they need free airflow to maintain thermal performance under sustained load.
Shop the latest Electronics picks on Amazon.
Shop Amazon →3. Install Storage and Memory
For most users, configuring a boot NVMe drive and one or more SATA drives for bulk storage strikes a good balance. When installing:
- Follow anti-static precautions—ground hands or use a wrist strap.
- Install memory modules in recommended slots (consult manual for dual-channel population).
- Secure NVMe drives with the proper standoff or screw; align SATA cables and power connectors for secure attachment.
4. Connect Network and Peripherals
Connect to the primary network port for initial setup. For headless setups, it is sufficient to connect Ethernet and power the unit. If direct local control is needed, attach a monitor and keyboard to HDMI/USB ports. Attach external USB drives or backup devices only after the operating system is installed and updated to avoid OS-level conflicts.
5. Power-Up and Firmware/Bios Configuration
On first boot, enter the BIOS/UEFI to:
- Verify recognized storage, memory, and network interfaces.
- Set boot order (NVMe boot preferred for speed).
- Enable virtualization support if planning to use VMs or containers.
- Check for firmware updates—download and apply official updates using vendor-provided instructions (manual update via USB or web-based updater).
6. Install the Operating System
Choose an OS aligned with use case:
- Linux distributions (Ubuntu Server, Debian) for general-purpose servers and easy software ecosystem access.
- Specialized NAS OS options for file serving (if supported by the device).
- Lightweight hypervisor or container runtime for virtualization-focused use.
Follow standard installation procedures and apply system updates immediately. Configure SSH access for remote management and change default passwords.
7. Configure Storage Pools and Backups
Set up filesystems and redundancy according to need:
- For reliability, consider software RAID (e.g., RAID1 or RAID5) or ZFS pools when multiple disks are used.
- Allocate an NVMe for OS and caching, SATA for bulk data, and configure snapshots or scheduled backups to an external drive or remote storage.
8. Network and Security Hardening
Hardening recommendations include:
- Change default management ports where possible and enforce strong authentication.
- Use firewalls and limit management access to trusted IPs or VPNs.
- Keep the OS and critical services updated and enable automatic security updates where practical.
9. Performance Tuning and Monitoring
Monitor CPU, memory, and disk I/O during initial workloads. Adjust swappiness, I/O scheduler, and caching strategies for optimal performance. Tools such as atop, iostat, and Prometheus (with lightweight exporters) provide useful telemetry. For media workloads, ensure hardware-accelerated codecs are enabled in the media server software to offload CPU work.
Buying Guide: What to Consider Before Choosing the Flexus Core 200
Identify the Primary Use Case
Buyers should be explicit about what they intend to run. The Core 200 is an excellent fit for mixed-use tasks—media streaming, light virtualization, network appliance—but it is not designed to replace high-density compute servers. Select a configuration with adequate RAM and NVMe support if virtualization or frequent random I/O is expected.
Connectivity Needs
If the environment requires heavy network throughput—multiple 4K streams or high concurrency access—confirm whether a 2.5GbE or 10GbE option is available or whether a PCIe upgrade is feasible. For single-user home setups, dual Gigabit Ethernet will often suffice.
Discover deals on Electronics — updated daily.
View Offers →Storage Strategy
Decide on the storage profile early:
- Performance-focused: NVMe boot and caching + SSDs for hot data.
- Capacity-focused: Multiple SATA drives in RAID for bulk content.
- Hybrid: NVMe for OS and cache, SATA for large media libraries.
Future Expandability
Check upgrade paths for RAM and storage. If future-proofing is important—planning to add more VMs or storage—choose the highest RAM and drive bay count that fits budget. Also confirm whether BIOS updates and driver support are readily available for future OS upgrades.
Noise and Energy Constraints
Consider where the device will live. Bedrooms or shared living areas benefit from quieter, lower-power models. If the device will run 24/7, estimate electrical cost and cooling needs—these impact total cost of ownership more than one-time purchase price.
Warranty and Support
Review the warranty period and the vendor’s support channels. For business-critical use, extended support or on-site service options reduce downtime risk. Community support and active forums are helpful for home-lab deployments.
Common Troubleshooting Tips
Boot Issues
Verify that the NVMe or intended boot media is visible in the UEFI and is prioritized in the boot order. If the device fails to boot after OS installation, re-check secure boot settings or try a different USB installer to rule out corrupted media.
Network Latency
If network performance is lower than expected, test with direct connection to a known-good switch or router, replace cables, and check duplex/negotiation settings. For Wi-Fi add-ons, ensure drivers support the chosen OS.
Thermal Throttling
Monitor CPU and drive temperatures. If throttling occurs under consistent load, re-evaluate placement for airflow, verify fan operation, and consider enabling more aggressive fan curves or adding supplemental cooling.
Conclusion
The Flexus Core 200 is a well-balanced device for users who need a compact, versatile platform for home lab projects, media serving, and edge services. It delivers a practical blend of performance, connectivity, and energy efficiency while remaining accessible to hobbyists and IT professionals alike. By planning the storage layout, choosing the right OS and networking options, and following the setup and hardening recommendations in this guide, buyers can create a reliable and capable system tailored to their specific needs. The Core 200 isn’t a universal solution for all heavy workloads, but for its intended mid-range use cases, it represents an attractive and pragmatic choice.